Should You Install Gutters Yourself?
DIY gutter installation can be a challenging but rewarding project for homeowners looking to save money on installation costs and improve their home’s drainage system. With the right tools, materials, and knowledge, it’s possible to install gutters yourself and ensure they function properly to protect your home from water damage.
If you’re unsure about DIY projects for gutters and roofing, contact Thunder Bay Roofing today. We offer roofing, siding, and gutter services for every homeowner in Maryland. Call 410-956-7663 for a free estimate.
Benefits of DIY Gutter Installation
If you’re thinking of installing gutters yourself, you may experience the following benefits:
- Cost Savings: Hiring a professional to install your gutters can be expensive, so by doing the installation yourself, you can save money on labor costs.
- Personal Satisfaction: Completing a DIY project can be satisfying and give homeowners a sense of accomplishment.
- Customization: When installing your gutters, you have more control over the design and materials used, allowing you to customize the gutters to your home’s specific needs and aesthetic.
- Flexibility: DIY gutter installs allow you to work at your own pace and schedule, making it easier to fit the project into your busy life.
- Faster Completion: Hiring a professional to install gutters can take several days or even weeks, while a DIY installation can often be completed in a single weekend.
- Better Understanding of Your Home: By installing gutters yourself, you gain a better understanding of your home’s roofline and drainage system, which can be beneficial for future maintenance and repairs.
Tools You’ll Need for DIY Installation
Before you start any DIY job, you’ll need the right tools. Some of the tools you’ll need for a DIY gutter installation job include:
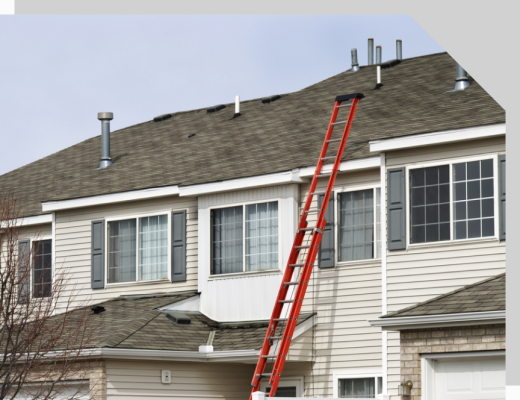
- Ladder
- Tape Measure
- Level
- Tin Snips
- Drill
- Rivet Gun
- Gutter sealant
- Safety gear
- Sheet metal screws
Common Mistakes To Avoid
Incorrect Measurements
Measuring accurately is crucial when you install rain gutters. Failing to measure correctly can result in gutters that are too short or too long, which can lead to water damage or inefficiency.
Improper Slope
Gutters need to be installed with a slight slope to ensure proper water flow. Rain gutter installation without the right slope can cause water to pool and eventually overflow, causing water damage to the home’s foundation.
Inadequate Support
Gutters need to be supported with the proper hangers to ensure they don’t sag or fall off the roof. Not installing enough hangers or using weak hangers can result in the end of the gutter falling off during heavy rain or wind.
Poor Sealing
Gutters need to be sealed at the joints to prevent leaks. Poor sealing or not sealing at all can cause water to seep through the seams and damage the home’s foundation.
Using the Wrong Materials
Choosing the wrong materials for gutters can result in inefficiency or a shorter lifespan. For example, using aluminum gutters in areas with heavy snowfall can cause them to warp and break.
Inadequate Cleaning
Regular gutter cleaning is necessary to prevent clogs and ensure proper water flow. Neglecting to clean gutters can result in water damage or even the collapse of the gutter system.
Uninformed or Misinformed DIY installation
Attempting to install gutters without proper knowledge and tools can result in mistakes that can cause inefficiency or damage to the home’s foundation. It’s recommended to hire a professional for gutter installation if you’re unsure of the process.
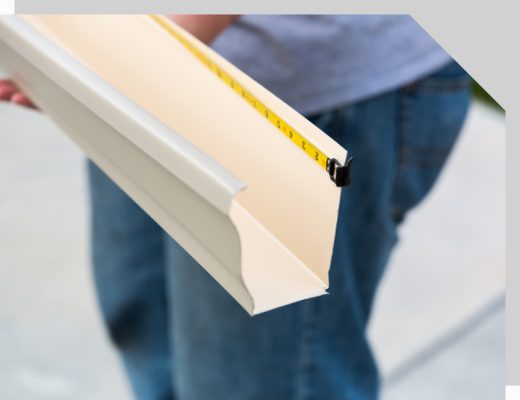
Measuring and Calculating the Amount of Gutter Needed
Measuring and calculating the amount of gutter needed is an essential step in the DIY gutter installation process. Here are some steps to follow to ensure you get the correct amount of gutter for your home:
- Measure the Roofline: Measure the length of each section of your roofline that will require gutters. Add the measurements together to get the total length in feet.
- Determine the Number of Stories: Multiply the total length of the roofline by the number of stories your home has. This will give you the total linear footage of gutters you will need.
- Factor in the Pitch: The pitch or slope of your roof will also affect the amount of gutter you need. The steeper the roof, the more water it will shed, so you may need larger gutters or more downspouts. Use a gutter sizing chart or consult with a professional to determine the appropriate size for your roof’s pitch.
- Add Extra for Corners and Downspouts: Don’t forget to add extra gutter material for corners, elbows, and downspouts. These areas may require additional gutter pieces and connectors.
- Consider the Gutter Material: Different gutter materials come in different lengths, so be sure to factor this into your calculations. For example, aluminum gutters typically come in 10 to 20-foot sections, while vinyl gutters may come in shorter lengths.
Step-by-Step DIY Gutter Installation by Style
Standard Gutters
- Measure the roofline where you will be installing the gutters.
- Cut the gutters to fit the length of the roofline.
- Install the end caps on each end of the gutters using a sealant.
- Attach the gutters to the fascia board using brackets or hangers.
- Install downspouts at the end of the gutters and secure them to the wall.
Seamless Gutters
- Measure the roofline where you will be installing the gutters.
- Use a gutter machine to create seamless gutter sections that fit the length of the roofline.
- Attach the gutters to the fascia board using brackets or hangers.
- Install downspouts at the end of the gutters and secure them to the wall.
Sectional Gutters
- Measure the roofline where you will be installing the gutters.
- Cut the gutter sections to fit the length of the roofline.
- Connect the gutter sections using seamers or slip joints.
- Install the end caps on each end of the gutters using a sealant.
- Attach the gutters to the fascia board using brackets or hangers.
- Install downspouts at the end of the gutters and secure them to the wall.
Half-Round Gutters & European Gutters
- Measure the roofline where you will be installing the gutters.
- Cut the gutter sections to fit the length of the roofline.
- Install the end caps on each end of the gutters using a sealant.
- Attach the gutters to the fascia board using brackets or hangers.
- Install downspouts at the end of the gutters and secure them to the wall.
Box Gutters
- Measure the roofline where you will be installing the gutters.
- Build a wooden frame that fits the length of the roofline.
- Line the frame with waterproof material such as rubber or asphalt.
- Install the gutters on top of the frame using brackets or hangers.
- Install downspouts at the end of the gutters and secure them to the wall.
Fascia Gutters
- Remove any existing gutters from the fascia board.
- Measure the roofline where you will be installing the gutters.
- Cut the gutter sections to fit the length of the roofline.
- Install the end caps on each end of the gutters using a sealant.
- Attach the gutters to the fascia board using brackets or hangers.
- Install downspouts at the end of the gutters and secure them to the wall.
Custom Gutters
- Measure the roofline where you will be installing the gutters.
- Design the gutters to fit the specific dimensions and style of the building.
- Cut the gutter sections to fit the length of the roofline.
- Install the end caps on each end of the gutters using a sealant.
- Attach the gutters to the fascia board using custom brackets or hangers.
- Install downspouts at the end of the gutters and secure them to the wall.
Step-By-Step DIY Gutter Installation By Material
Aluminum Gutters and Steel Gutters
- Measure the length of the roofline where the gutter will be installed.
- Cut the gutter to the measured length using a saw.
- Attach the end caps to the gutter and seal them with a silicone caulk.
- Install the downspouts at the appropriate locations by drilling holes through the gutter and the wall.
- Attach the gutter hangers to the roof using screws.
- Hang the gutter onto the hangers, making sure it has a slope of 1/4 inch for every ten feet of gutter.
- Seal the joints between the gutter sections with a silicone caulk.
Copper Gutters
- Measure the length of the roofline where the gutter will be installed.
- Cut the gutter to the measured length using a saw.
- Attach the end caps to the gutter and seal them with copper caulk.
- Install the downspouts at the appropriate locations by drilling holes through the gutter and the wall.
- Attach the gutter hangers to the roof using copper screws.
- Hang the gutter onto the hangers, making sure it has a slope of 1/4 inch for every ten feet of gutter.
- Solder the joints between the gutter sections using a propane torch and lead-free solder.
Vinyl Gutters
- Measure the length of the roofline where the gutter will be installed.
- Cut the gutter to the measured length using a saw.
- Attach the end caps to the gutter and seal them with a vinyl caulk.
- Install the downspouts at the appropriate locations by drilling holes through the gutter and the wall.
- Attach the gutter hangers to the roof using screws.
- Hang the gutter onto the hangers, making sure it has a slope of 1/4 inch for every ten feet of gutter.
- Seal the joints between the gutter sections with a vinyl caulk.
- Check the gutter system for any leaks or improper drainage by pouring water into the gutters.
Wooden Gutters
- Measure the length of the roofline where the gutter will be installed.
- Cut the wooden gutter to the measured length using a saw and a jointer.
- Assemble the wooden gutter using tongue and groove joints.
- Install the downspouts at the appropriate locations by drilling holes through the gutter and the wall.
- Attach the wooden gutter hangers to the roof using screws.
- Hang the gutter onto the hangers, making sure it has a slope of 1/4 inch for every ten feet of gutter.
- Seal the joints between the wooden gutter sections with a wooden gutter sealant.
Zinc Gutters
- Use a hacksaw or tin snips to cut the zinc gutter sections to the required size.
- Securely install the end caps and drop outlets using either solder or rivets.
- Attach the hangers to your roof with either screws or nails, spaced out by the manufacturer’s instructions.
- Hang the gutter sections onto the hangers, ensuring a slope towards the downspouts of 1/4 inch per 10 feet.
- Use solder or slip joints to connect the gutter sections, making sure they are tightly sealed.
- Fix the downspouts and elbow joints, ensuring they are securely fastened to the gutter sections.
- Check the gutter system for any leaks or improper drainage by pouring water into the gutters.
Stainless Steel Gutters
- Measure and cut the gutter sections to the correct size using a hacksaw or tin snips. It’s important to get accurate measurements to ensure that the gutter system fits properly.
- Install the end caps and drop outlets using rivets or solder. Make sure they are securely fastened to prevent any leaks.
- Attach the hangers to the roof using screws or nails, and follow the manufacturer’s instructions for spacing. This will ensure that the gutters are properly supported.
- Hang the gutter sections on the hangers, making sure they slope towards the downspouts at a rate of 1/4 inch per 10 feet. This slope is necessary for proper drainage.
- Connect the gutter sections using either solder or slip joints. Make sure they are tightly sealed to prevent any leaks.
- Install the downspouts and elbow joints, securely fastening them to the gutter sections. This will ensure that they stay in place during heavy rain and wind.
- Test the gutter system by pouring water into the gutters and checking for leaks or improper drainage.
PVC Gutters
- Measure and cut the PVC gutter sections to size with a sharp utility knife or PVC cutter, following the manufacturer’s instructions.
- Apply PVC cement to the end caps and drop outlets, and attach them to the gutter sections.
- Use screws or nails to attach the hangers to the roof, spaced according to the manufacturer’s instructions.
- Hang the gutter sections on the hangers, making sure they slope towards the downspouts at a rate of 1/4 inch per 10 feet.
- Connect the gutter sections with PVC connectors, ensuring a tight seal between each joint.
- Securely fasten the downspouts and elbow joints to the gutter sections using screws or nails.
- Test the gutter system by pouring water into the gutters, and checking for any leaks or issues with drainage.
Fiberglass Gutters
- Begin by measuring and cutting the fiberglass gutter sections to size using a sharp hacksaw or tin snips.
- Install the end caps and drop outlets using a strong and durable fiberglass resin. Make sure to follow the manufacturer’s instructions for the resin, as it can vary depending on the brand.
- Attach the hangers to the roof using screws or nails, spacing them according to the manufacturer’s instructions.
- Hang the gutter sections on the hangers, making sure that they slope towards the downspouts at a rate of 1/4 inch per 10 feet.
- Connect the gutter sections using fiberglass connectors, ensuring that they are tightly sealed.
- Install the downspouts and elbow joints, ensuring that they are securely fastened to the gutter sections.
- Test the gutter system by pouring water into the gutters to check for leaks or improper drainage.
Frequently Asked Questions
While installing gutters is a manageable DIY project, it does require some level of experience and comfort with working at heights. If you have little or no experience with home repairs or lack the necessary tools, it may be best to hire a professional to install your gutters.
The cost of DIY gutter installation will depend on the size of your home, the type of gutters you choose, and any additional materials or tools needed. On average, the cost can range from $200 to $1,500 or more. However, installing gutters yourself can save you money on labor costs compared to hiring a professional.